
7 Ford F-Series Glass and Windshield Replacement Tips
Ford F-Series Auto Glass Replacement: What You Need to Know
Replacing the glass or windshield on your Ford F-Series requires expert knowledge and specialized tools to ensure safety, precision, and durability. Proper replacement by trained professionals guarantees that your vehicle maintains its safety standards, structural integrity, and legal compliance. Below, you’ll find a comprehensive overview of the key considerations, essential tips, and a step-by-step outline to help you understand the professional procedure involved in replacing Ford F-Series glass or a windshield.
Importance of Professional Glass and Windshield Replacement
The windshield and side glass components of your Ford F-Series are vital for vehicle safety, visibility, and structural strength. Damaged glass can impair vision, increase the risk of injury, and compromise the vehicle’s frame during an accident. Timely professional replacement helps preserve vehicle safety, prevents leaks, and maintains optimal performance.
Expert-Recommended Checklist for Glass and Windshield Replacement
To ensure the highest quality work, professionals typically utilize a checklist that includes:
- Selecting OEM (Original Equipment Manufacturer) or certified aftermarket replacement glass compatible with Ford F-Series models
- Using specialized adhesives and primers designed for automotive glass
- Performing detailed cleaning of the vehicle’s frame and mounting surfaces
- Employing professional-grade glass removal and installation tools
- Carefully inspecting the fit and seal after installation, allowing proper curing time for adhesives
- Conducting a thorough inspection and road test post-installation
A comprehensive approach ensures the replacement is performed to the highest safety and quality standards.
7 Tips for Windshield and Glass Replacement
1. Use Only High-Quality Replacement Parts
Certified OEM or equivalent aftermarket glass ensures perfect fit and safety standards. Professionals always prioritize quality parts to guarantee longevity and safety.
2. Work in a Controlled Environment
The replacement process is conducted in a clean, climate-controlled setting to prevent dirt, dust, or debris from contaminating the adhesive bond, thereby ensuring a secure fit.
3. Follow Manufacturer and Industry Standards
Certified technicians adhere strictly to manufacturer guidelines and industry best practices concerning adhesive application, curing times, and installation procedures.
4. Handle Glass with Care and Proper Equipment
Skilled technicians utilize suction cups and safety gear to manage glass panels efficiently without risking damage or injury.
5. Allow Adequate Curing Time
Proper curing of adhesives is essential for a secure seal. Professionals ensure the glass remains undisturbed for the recommended duration, typically 24 hours.
6. Verify the Seal and Fit
Post-installation, technicians perform detailed inspections to confirm perfect fitment, proper sealing, and absence of leaks or misalignment.
7. Conduct a Final Inspection and Road Test
Before releasing the vehicle, professionals scrutinize the installation and conduct a test drive to identify any issues, such as unusual noises, vibrations, or leaks.
Walkthrough of the FORD F-SERIES GLASS Replacement Process
Step 1: Prepare the Vehicle and Workspace
Technicians begin by parking your Ford F-Series truck on a flat surface in a controlled environment. The battery is disconnected if necessary, and all required tools and materials are prepared to ensure a safe and efficient replacement.
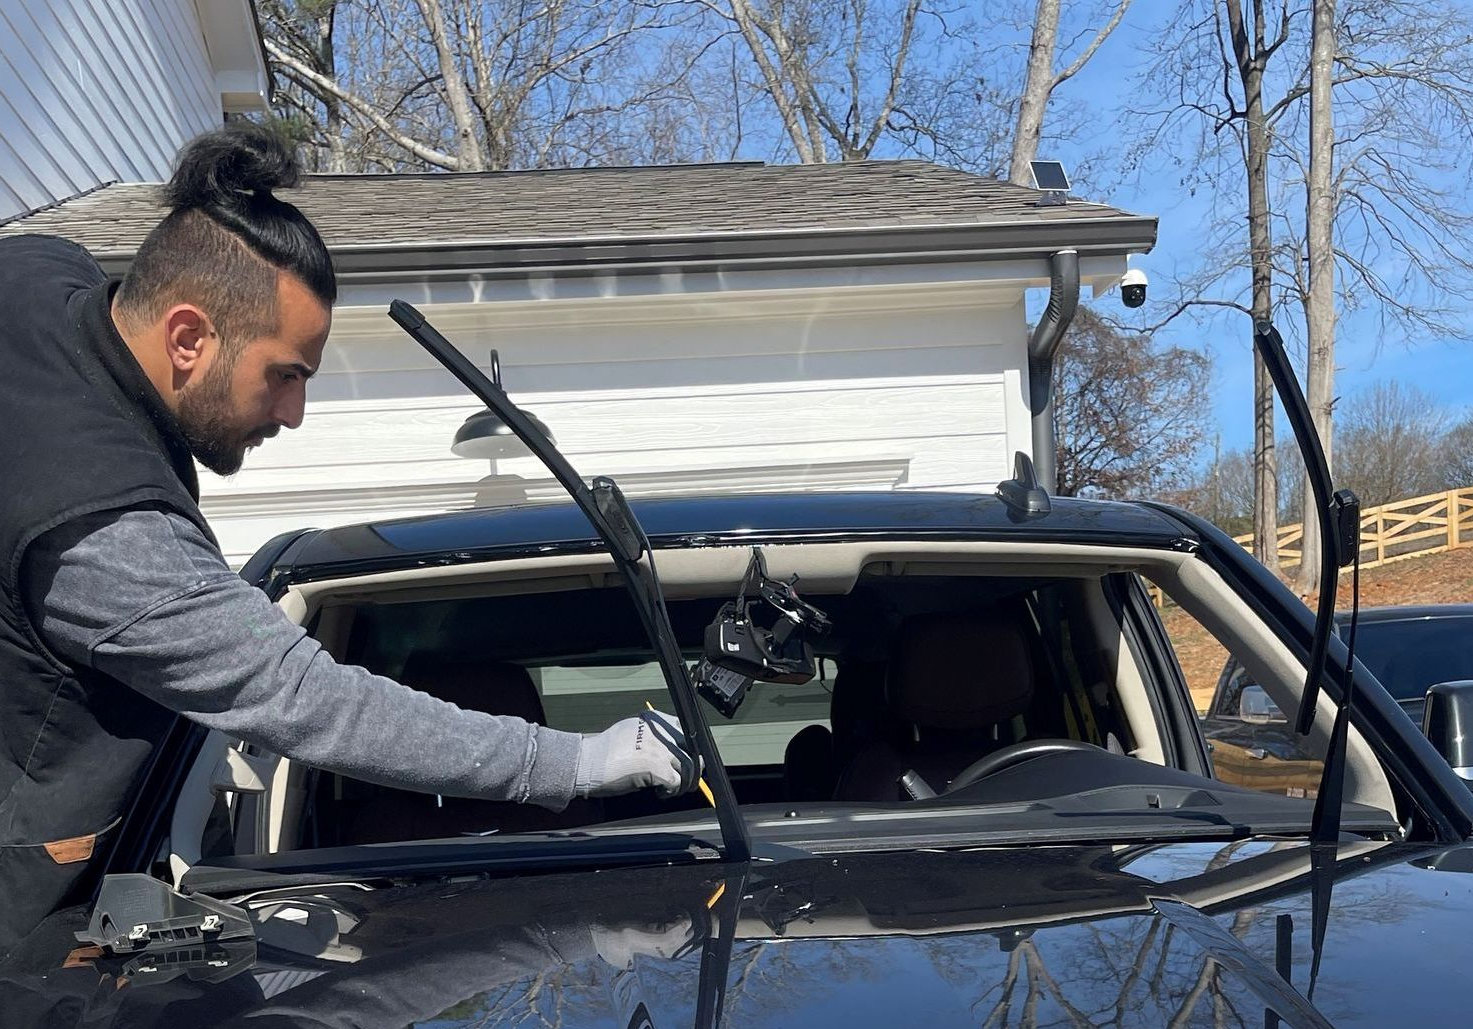
Step 2: Remove the Damaged Glass
Trained specialists carefully detach the existing windshield or glass panels using professional-grade tools designed for Ford F-Series models. Special care is taken to avoid any damage to the vehicle’s frame, paint, or interior components.
Step 3: Clean and Prepare the Frame
Any remaining adhesive residue, debris, or dirt is thoroughly removed from the mounting surfaces, ensuring a clean, flat surface for the new glass.
Step 4: Apply Primer and Adhesive
Qualified technicians apply industry-approved primer and advanced adhesive to designated areas, following strict protocols to ensure optimal bonding and curing.
Step 5: Install the New Glass
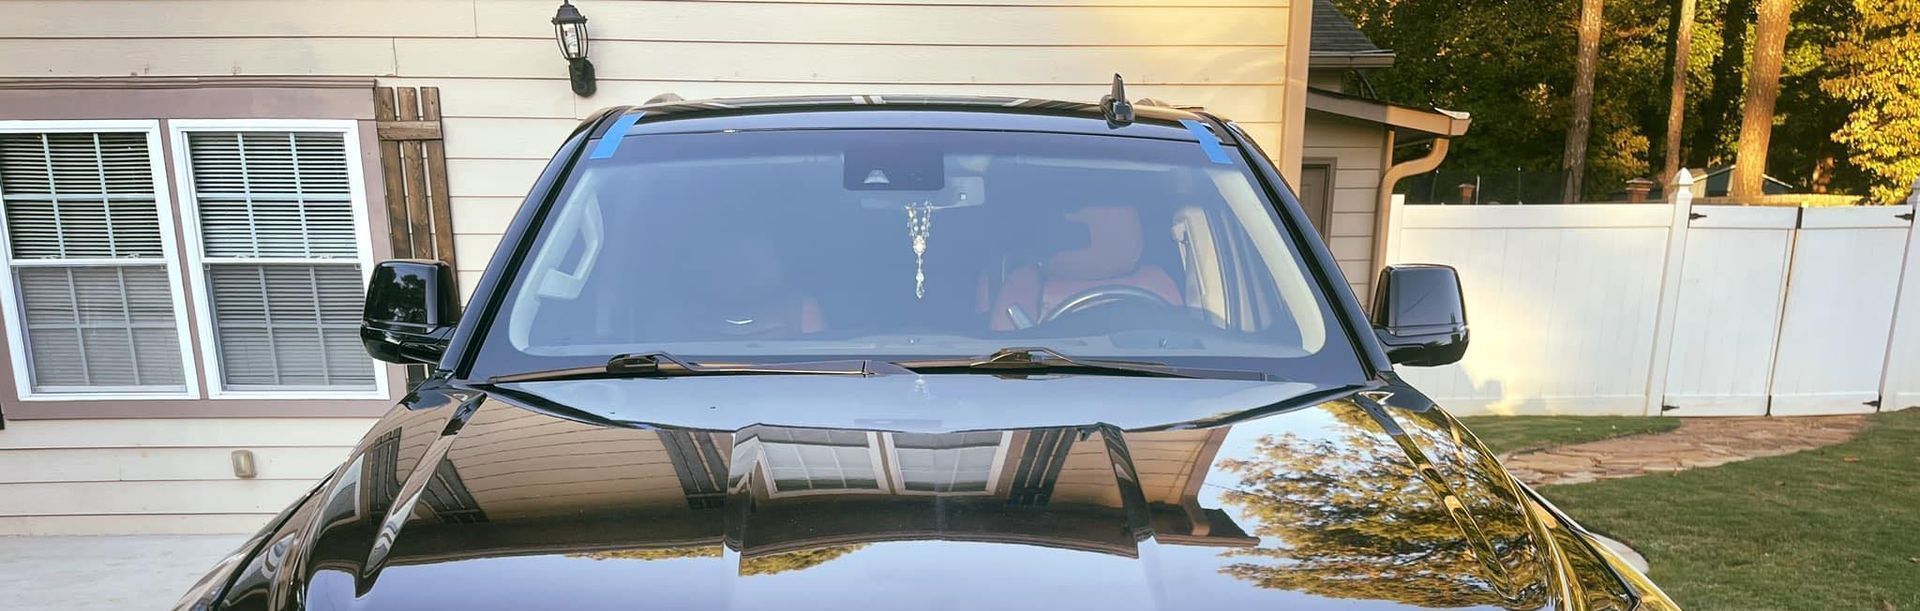
The new windshield or side glass is precisely positioned using professional equipment to match the Ford F-Series body design. The glass is carefully pressed and secured in place, and masking tape is applied to hold it steady during the curing process.
Step 6: Curing and Inspection
The adhesive is allowed to cure for the recommended period—often 24 hours—without disturbance. Subsequently, the installation is inspected for proper fit, seal, and safety.
Step 7: Final Checks and Clean-Up
A detailed assessment is performed, including water-leak testing and a visual inspection to confirm the glass is securely installed. The glass and surrounding areas of your Ford F-Series are cleaned thoroughly, and the vehicle is ready for use once the adhesive has fully set.
When to Consult a Professional
While trained specialists are best suited to many vehicle repairs, a professional windshield and glass replacement ensures safety, quality, and compliance. It is especially advisable when:
- The damage is extensive or involves structural components
- The replacement requires specialized tools or techniques
- There are concerns about insurance coverage or warranties
- Ensuring a perfect seal and safety standards is critical
Professional technicians possess the expertise, experience, and equipment necessary for a flawless replacement that aligns with safety regulations.
Does Your Ford F-Series Truck Have Windshield Damage in the Grayson, GA Area?
If you drive a
Ford F-Series truck in
Norcross,
Snellville, or
Lawrenceville, GA, and discover
windshield
damage,
contact us at Express Mobile Auto Glass. We offer
insurance claims assistance and can come to you or handle the replacement at our shop—whichever is most convenient for you.